Quick Links
-
Set the Right Input Device
-
Enable Audio Enhancements
If your voice always sounds muffled on calls, adjusting your Windows microphone settings can help. A few quick tweaks to your input device, volume, and audio enhancements will help you come through loud and clear.
Set the Right Input Device
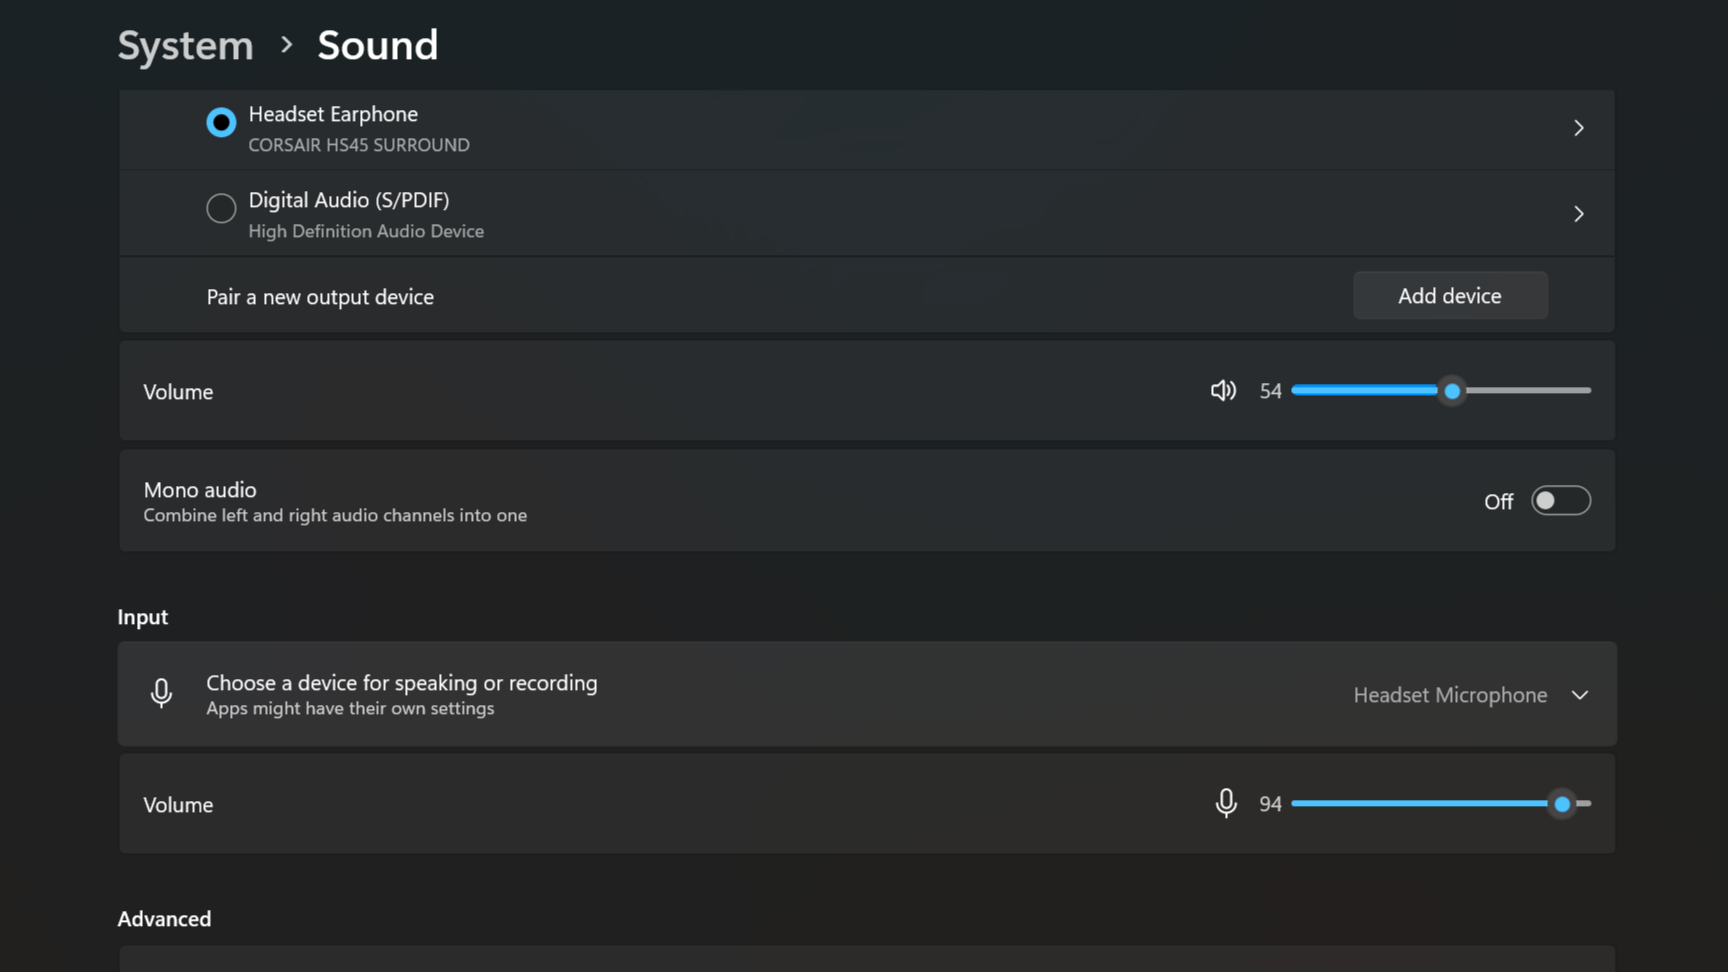
The first step to improving your call quality is making sure Windows is using the correct microphone. This is especially important if you have multiple audio input devices connected, such as a headset and a webcam with a built-in mic.
To check your input device through Sound Settings:
- Right-click the speaker icon in the taskbar.
- Select Sound Settings from the menu that appears.
- Under the Input section, click the dropdown menu labeled Choose a device for speaking or recording.
- Select the desired microphone from the list of available devices.
If you’re not sure which microphone to choose, try speaking into each one and watch the blue bar above Test your microphone to see which one picks up your voice the best—the higher the bar, the clearer your audio will be.
Alternatively, you can also access the sound settings through the Control Panel:
- Click the Start menu and open the Control Panel.
- Click on Hardware and Sound and select Sound.
- In the Recording tab, right-click on the desired microphone.
- Select Set as Default Device and click OK to save the changes.
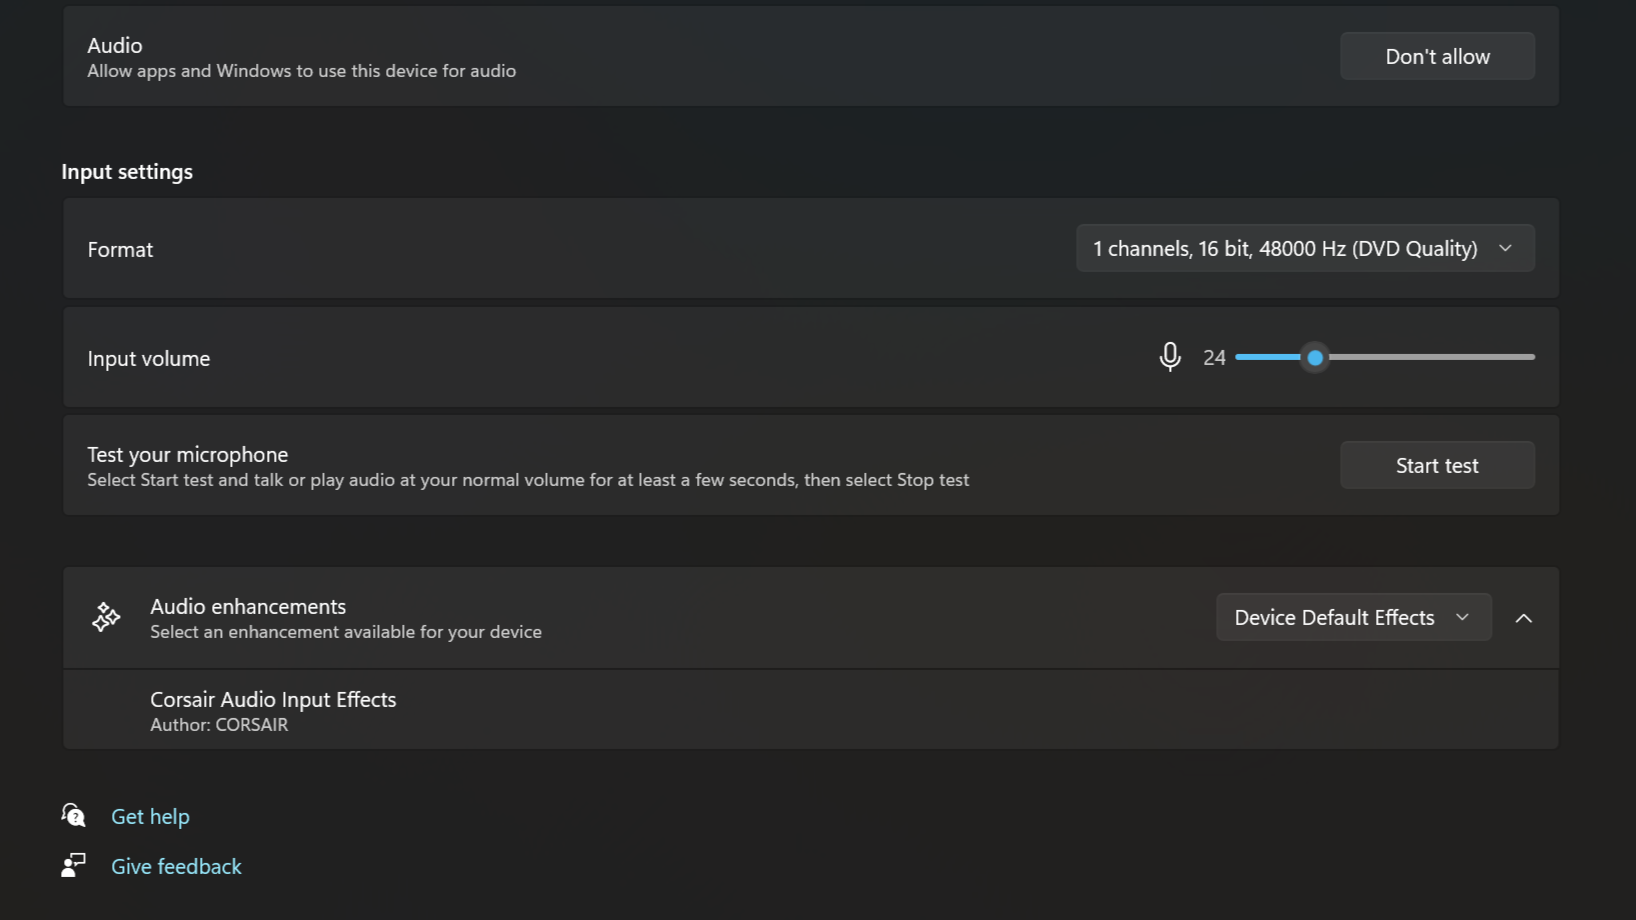
Adjust the Input Volume
After selecting the right microphone, you’ll want to confirm it’s picking up your voice at an optimal volume—it’s always a good idea to test this before an important meeting.
If your input volume is too low, your voice will sound quiet and distant to others on the call. To adjust your mic input volume:
- Open Sound Settings by right-clicking the speaker icon in the taskbar.
- Under the Input settings section, locate the Volume slider.
- Adjust the slider to the desired level—generally, somewhere in the middle works well.
- Speak normally and watch the blue bar rise and fall as you talk.
- If the bar barely moves, your volume is too low; if it consistently hits the top, it’s too high.
If you still have trouble getting a clear input level, try moving the microphone closer to your mouth or speaking more directly into it. With a bit of tweaking, you’ll find the perfect volume setting for your voice.
Enable Audio Enhancements
Windows offers a few built-in audio enhancements that can help improve your microphone’s clarity and reduce background noise. To access these settings:
- Open Sound Settings by right-clicking the speaker icon in the taskbar.
- Under the Input section, click Device properties.
- In the Properties window, select the Audio enhancements tab.
- Select the Device Default Effects if available for your device.
If your headphones don’t come with any compatible software, you can also try Windows Sonic for Headphones—a feature that simulates surround sound and can enhance your audio experience.
To enable it, click the speaker icon in the taskbar, then click select a sound output. Under Spatial sound, choose Windows Sonic for Headphones.
You may also consider third-party apps like SteelSeries Sonar for even more customization options or Corsair iCUE if you’re using a Corsair headset.
These programs offer advanced features such as equalizer settings, mic volume boost, and real-time mic monitoring, giving you greater control over your audio input and output.
With these simple tweaks to your Windows microphone settings, you’ll be well on your way to clearer, more professional-sounding calls. You can also try some of the steps in our guide on how to fix your headset mic not working on Windows if you’re still having issues or in a pinch, or you can even use your phone’s microphone for urgent meetings.

