What if your PC could take care of boring tasks for you? With Windows PowerShell, it can. Here’s how I use PowerShell to automate everyday repetitive tasks that I would be less keen to do otherwise.
What is Windows PowerShell?
PowerShell is a command-line shell and scripting language built into Windows that can help you automate administrative and repetitive tasks. If you’ve used it before, it might already feel familiar. But if you’re new to it, don’t worry—PowerShell is easy to pick up.
With PowerShell, you can write scripts to handle everyday tasks like organizing files into folders by type, downloading updates when you sleep, or creating a disk size report to see how much space is left on your computer.
Of course, PowerShell can do a whole lot more. But in this guide, we’ll stick to the basics so you can understand its fundamentals. We’ll also create simple PowerShell scripts and a fun project that lets you organize all the files in the Downloads folder by their type.
Understanding the Basics of PowerShell
To master PowerShell, you must first understand its key components:
- Cmdlets: Cmdlets (pronounced as command lets) are simple single-purpose commands. For example, type Get-Date to retrieve current day, date, year, and hours.
-
Scripting and Pipelines: A PowerShell script is a combination of commands, separated by a pipe operator (|), to connect commands and pass the output of one command as the input to the next command. For example, type the following command to retrieve a list of processes sorted by CPU usage:
get-process | sort-object CPU -Descending -
Objects: PowerShell outputs objects rather than plain text, making it easier to manipulate data. For example, type the following command to retrieve the current date and time as an object with specific properties:
Get-Date | Select-Object -Property Day, Month, Year -
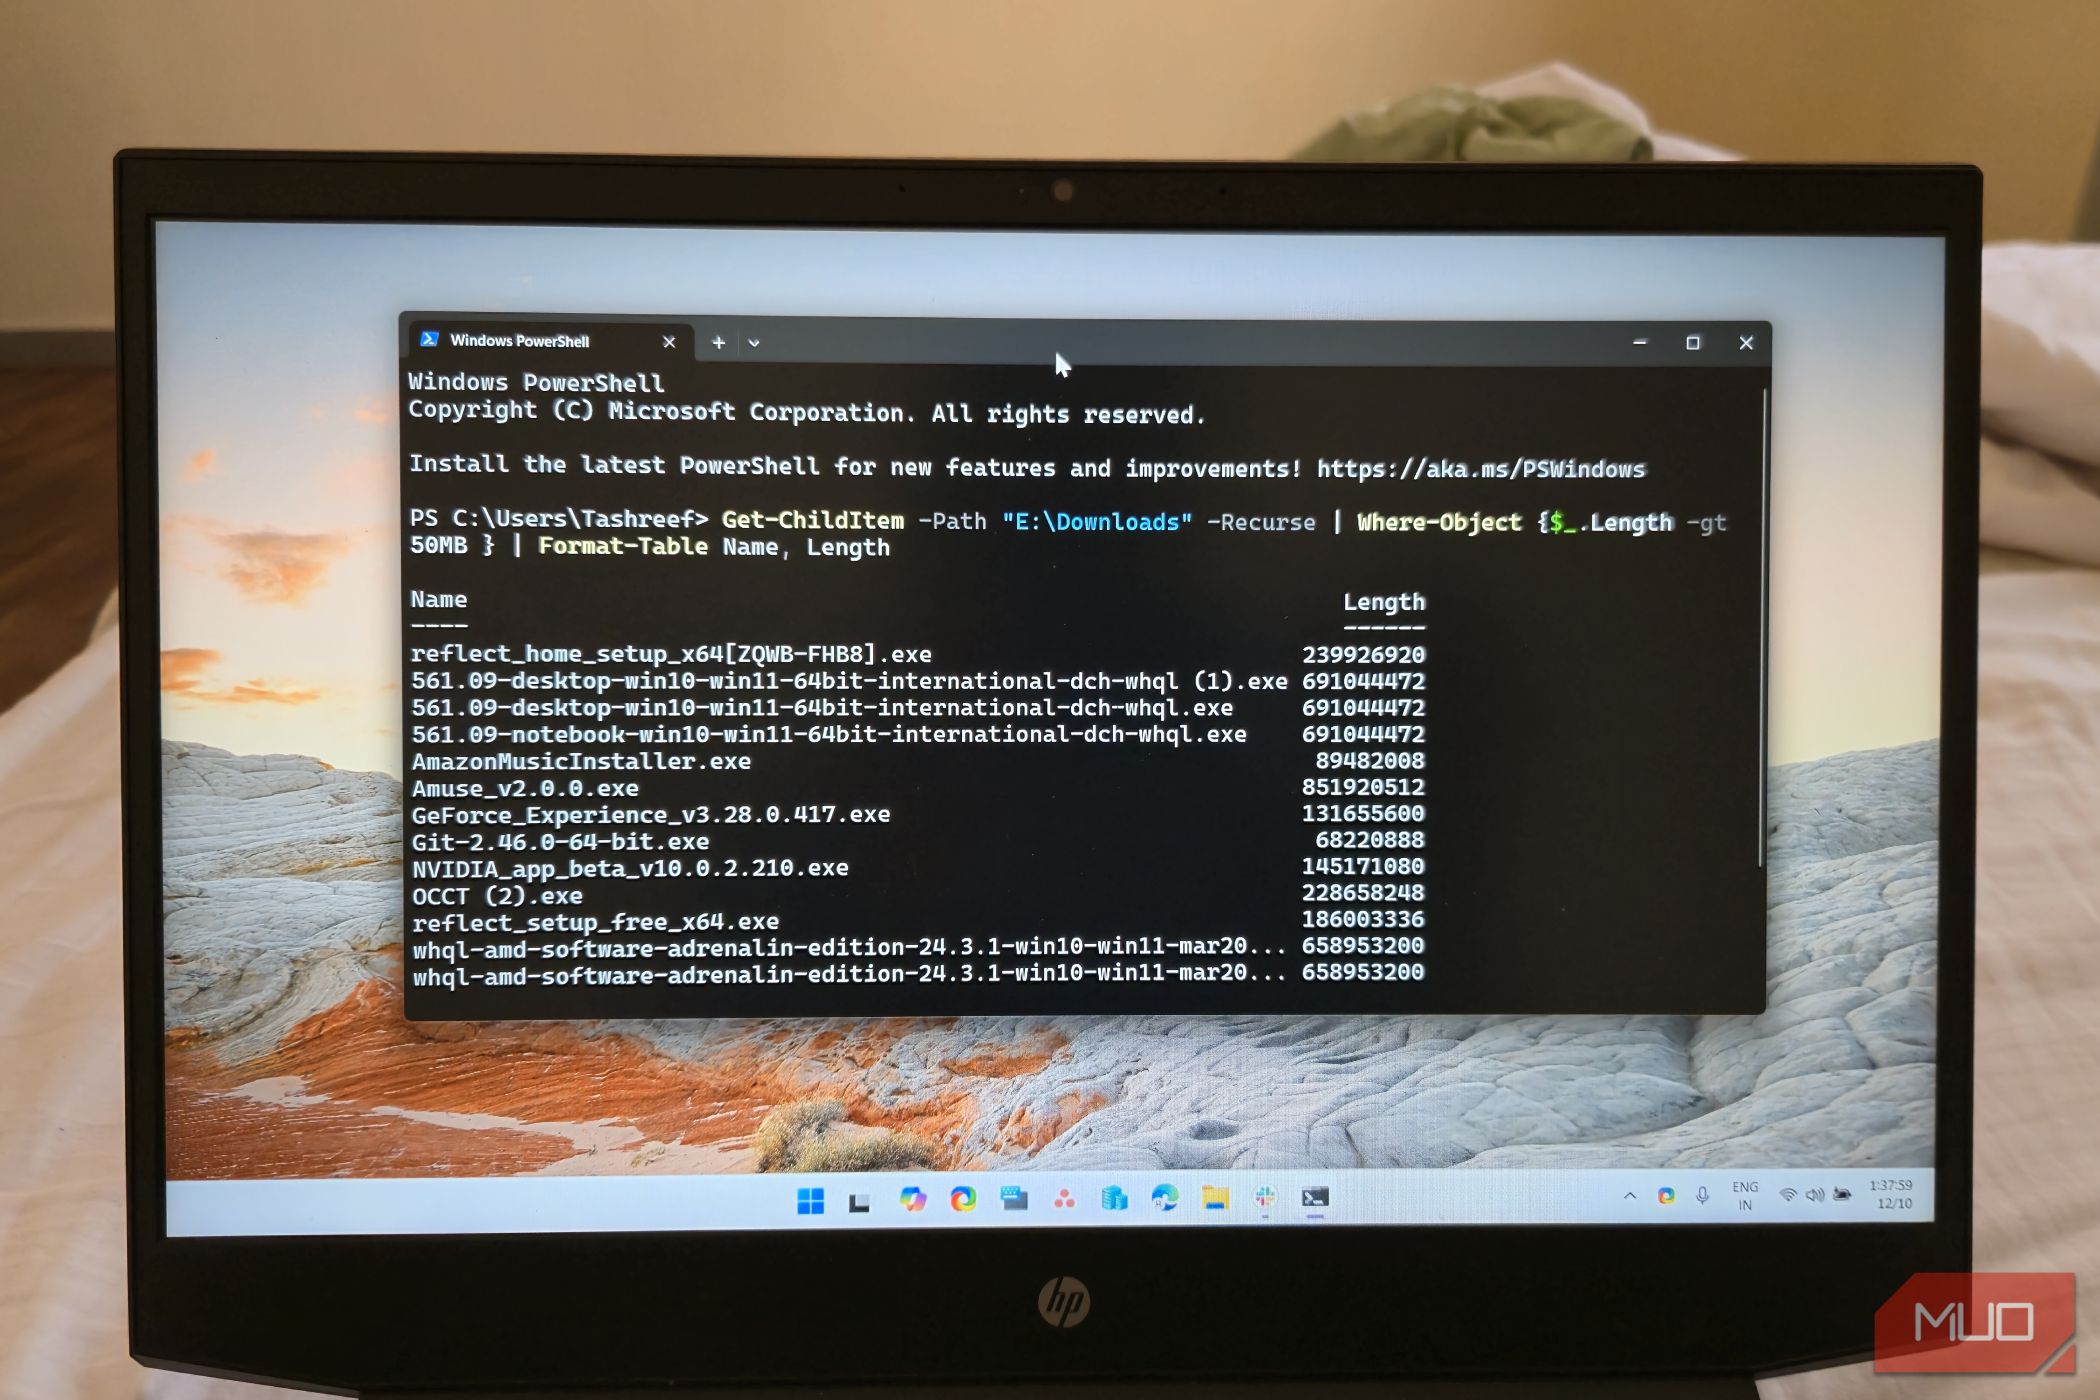
Filtering and Formatting: Use Where-Object for filtering and Format-Table or Format-List to get customized output. For example, type the following command to find files larger than 50 MB in your Downloads folders and display their names and sizes in a table:
        Get-ChildItem -Path "E:Downloads" -Recurse | Where-Object
New-Item -ItemType Directory -Path $destPath  | Format-Table Name, Length
Other essential PowerShell cmdlets include Get-Help to learn about any cmdlet, Get-Command to get a command list, and Get-ChildItem to explore files and folders in a directory.
We highly recommend reading our guide on essential PowerShell commands and Windows PowerShell scripting to learn more about commands and the basics of scripting. It will help you go beyond the basics and dig deeper into everything PowerShell can do.
Writing Simple PowerShell Scripts
You can use PowerShell to automate almost anything, like batch renaming files for consistency or automating app launches. Let’s write a few simple Windows PowerShell scripts to see it in action.
If you encounter an error when executing a script about the execution policy, you may need to temporarily allow script execution by running “Set-ExecutionPolicy -Scope Process -ExecutionPolicy Bypass”
Batch Rename Files in a Folder
You can use PowerShell to copy, move, and delete files on your PC. You can also batch rename files with specific file types. For instance, here’s how you can rename multiple text files by replacing the prefix “oldco” with “newco” in their filenames:
        Get-ChildItem -Path "C:CompanyFiles" -Filter "*.txt" | Rename-Item -NewName
New-Item -ItemType Directory -Path $destPath
In the above script, “.txt” is the file extension filter. You can modify and set it to .jpg, .docx, etc, to search for different file types.
Automate Application Launch
If you open the same set of apps every day, you can write a PowerShell script to launch them with one click:
Start-Process "notepad.exe"
Start-Process "calc.exe"
Start-Process "Chrome.exe"
Start-Process "slack.exe"
Paste the script into a Notepad file and save it as LaunchFavoriteApps.ps1. Then, simply double-click the file to launch all the apps listed in the script
Copy Important Files to a Backup Location
You can periodically back up important files to a backup location using the following script. Make sure to change the source and destination paths as needed:
Copy-Item -Path "C:DocumentsMyFiles" -Destination "D:MyFilesBackup" -Recurse
Writing a PowerShell Script to Automate Daily File Organization
Due to the numerous types of files we download daily, the Downloads folder can quickly become a mess with all kinds of files scattered around. To fix this, we can write a PowerShell script that organizes downloaded files into folders by file type at the end of each day.
Open a new Notepad file and paste the following script. Make sure to change the source folder path in the script to match your Downloads folder path:
$sourcePath = "E:Downloads"
$fileTypes = @
New-Item -ItemType Directory -Path $destPath
foreach ($folder in $fileTypes.Keys) {
$destPath = Join-Path -Path $sourcePath -ChildPath $folder
if (!(Test-Path -Path $destPath))  Out-Null

foreach ($pattern in $fileTypes[$folder]) {
Get-ChildItem -Path $sourcePath -Filter $pattern -File -ErrorAction SilentlyContinue | ForEach-Object {
try {
Move-Item -Path $_.FullName -Destination $destPath -Force -ErrorAction Stop
Write-Output "Moved: $($_.FullName) to $destPath"
} catch {
Write-Warning "Failed to move file: $($_.FullName). Error: $_"
}
}
}
}
Write-Output "Files organized successfully!"
To save the file, click File > Save As, and type OrganizeDownloadsFolder.ps1 as the file name. Then, click Save as Type and select All Files. Double-click the OrganizeDownloadsFolder.ps1 file to run the script.
Task Scheduling and Execution
Of course, writing a script is one part of the automation process. The second part is to ensure the script can automatically execute itself to carry out the task. To do this, we can create scheduled tasks to run a script daily or as needed.
Open PowerShell, then copy and paste the following script and hit Enter. Be sure to replace ‘J:OrganizeDownloadsFolder.ps1‘ with the full file path to your OrganizeDownloadsFolder.ps1 script.
        $action = New-ScheduledTaskAction -Execute "PowerShell.exe" -Argument "-File 'J:OrganizeDownloadsFolder.ps1'"
$trigger = New-ScheduledTaskTrigger -Daily -At "5:00 PM"
Register-ScheduledTask -Action $action -Trigger $trigger -TaskName "OrganizeDownloadsFolderDaily"
Once done, hit enter. The script will create a scheduled task in the Task Scheduler to run the file organization script daily at 5:00 PM. If you prefer a different time, you can modify it in the above script.
Beyond this, you can use PowerShell to automate other day-to-day tasks, such as a space monitoring script that alerts you when you run out of free space on your primary drive, bulk password-protect PDF documents, and even dynamically apply wallpapers from an image folder.


